I wrote a version of this in March 2025 for my friend Ed Coleman. In December of 2024, the last of my resolve against wargaming crumbled away when I purchased the Hobgoblin rules. I’ve been slowly, over the previous three years, painting an army of Nick Lund’s orcs from Grenadier’s Fantasy Warriors line, so this surrender was probably inevitable. The thing was, I didn’t want to have to paint the Fantasy Warriors dwarves, too. I have a certain amount of Fantasy Warriors history with Ed and he had expressed some interest in the process previously–especially, I think, because of my insistence that the process is easier than the results may lead folks to believe. I had the miniatures already, and gods know I had enough paint. All he needed was a guide.
So, I wrote one up. I have to disclaim that I am not some super-duper miniature painter. I lack the skill, practice, eyesight, steady hand, patience and desire required to make high-engagement miniature painting videos. I enjoy making the most of old lumpy miniatures and making weird color choices and fiddling about until they look better than the paint jobs on toys produced in the early 1980s, something that, before I started actually painting, I thought was entirely impossible. I was wrong! This guide will almost certainly not win you a Golden Demon, but it will, hopefully, convince you that you can slap some paint on a little screaming metal person and make them look cool.
Chapter Zero: Preferences
I like old lead miniatures. I dislike resin and plastic ones (of any era, really). This is partly because I find white metal to have a proper heft, partly because resin and plastic snap while (older) metal bends (surprisingly, I can be ungraceful). I find that old sculpts, though often very flat- of boxy-seeming, were sculpted and cast in a way that minimized imperfections, which means less work correcting issues from the casting. I also try to err on the side of miniatures that haven’t been painted or seen play before, as those that have often seem worn or blurry, even with a fresh coat of paint. You might think, then, that I’d want modern castings from old molds (like Mirliton’s current production of Grenadier’s vintage designs), but I find they are more often marred by deal-breaking flaws. I cannot stress enough that if you’re interested in larger vintage designs, like dragons and giants that have multiple pieces, always hunt down vintage castings. In my experience, newer castings invariably come warped and are difficult to fit together properly.
Chapter One: Prep, Tools, Good Practices
Mold Lines
Most miniatures have mold lines and other imperfections leftover from the casting process. Basically, a mold line is a raised line that marks the spot where the two halves of the mold met, and a little material seeped out into the seam; they’re easy to spot on plastic toys. Modern miniatures tend to have more mold lines than older ones (again, in my experience). Older miniatures were often sculpted expressly to hide mold lines, which is nice.
Files (and in serious cases, electric-powered grinders) fix these issues. I’m kind of lazy about filing – painting usually minimizes how much I notice the lines, and even when I can notice it, I think I’m so used to toys having obvious mold lines that I just edit them out my vision. As with so many things, personal preference is going to guide your hand. Regardless of that, though, eventually you will come across a miniature with a messed-up base and the only way it will ever stand is if you file off a lump of whatever. Maybe after hacking at it with cutting pliers first. On smooth flat surfaces, files are going to leave visible scratches, but don’t panic: I have yet to have these remain visible after painting.
I use Army Painter’s files. I have yet to encounter a situation where a grinder is necessary, but they sure look cool in the videos I’ve watched. They seem like they would make it easy to overdo it. Also, wear a mask when you’re doing this work, or anything involving airborne particulates.
Little Screaming Metal People in the Bath
Wash your miniatures with dish soap and water before you prime them. Especially plastic ones. Some folks use chemicals in the casting process to make the finished model come out of the mold easier, and this leaves a residue that doesn’t mix with paint. Old miniatures are probably just straight up dirty, at least enough to warrant a rinse.
Optimal Primer
Metal miniatures and some plastic ones require a basecoat of primer. This is the first aesthetic decision in painting a given miniature. Black primer is forgiving, hides mistakes and sets up the model’s shadow zones, but the finished product tends to be darker hued and lower contrast, with a sort of muddy quality (this can be nice with leather and fur in particular). White primer makes for brighter, poppier colors and opens up the option of using magic paint (more on that later) as your basecoat. On the down side, white often requires multiple coats (which can be a pain, especially when precision is needed or if you’re using lots of red paint) and mistakes are harder to hide, especially where two colors meet. Gray sits between the two extremes and brings out the detail nicely. I use Vallejo primers and their gray is close enough to white that I don’t really see the distinction; magic paint works fine on Vallejo gray.
Of course, the same is not necessarily true of different brands. Some minis I recently bought on eBay came with a coat of dark gray primer that’s really nice to paint on, but dark enough that it defeats magic paint.
Vallejo’s black primer can be brushed on. I find the gray and white too watery for a brush and in both cases, I think they go on smoother and level out better when applied with an airbrush. As with all miniature paint, the aim is to apply as thin a layer as possible. Second coats and touch-ups can be done with a brush. Primer is self-leveling, so it often looks funky when first applied and then evens itself out as it dries. Usually. Be patient if a given miniature looks weird at first.
A lot of folks tell me that they prefer rattlecan primer (like, the stuff that comes out of a spray paint canister), but they’re so sensitive to the ambient humidity you’re only going to be able to prime like three days a year. Maybe that’s enough, but I live near a swamp, so…
Anyway, I hated working on gray and white primer initially, but I think the difference in the brightness of the end result has converted me. I’ve been using white mostly, lately, but have been thinking about going back to gray. If I ever do a bunch of grimy freaks for Forbidden Psalm or Trench Crusade, though, I’ll probably go with black. There are colored primers, too, and you can apply them in zones, but that is probably beyond the scope of this guide.
Handling
Primer is fragile, and is going to need touching up if you keep primed guys around a while (also, cover them, because dust on primer is a problem you don’t want to have – I have all my guys in plastic hobby boxes like mom used to keep her cross-stitch thread in). Regular miniature paint comes off pretty easily too, especially in a warm, moist hand. Thus, disposable rubber gloves are a must. When I started, I used Fun-Tak to stick minis to a handle thing. That’s OK. I mostly just hold them carefully now? Sometimes, for smaller miniatures, especially Slotta, I use alligator clip sticks. I bet a fly-fishing vise would work pretty good too.
When a miniature is finished, or you want to set a “save point,” you can spray them with fixative of varnish. Depending on the paint (especially magic paint), this might be a regular thing, as “dry” paint can reactivate when wet paint hits it1.
The problem here is that spray coat only works in warmer (but not hot) weather that isn’t super humid (see also rattlecan primer). Ugh. Brushable varnish is an option, but that seems like a disaster in the making and honestly is probably still subject to the temperature constraints2.
I favor Vallejo’s Acrylic Matte Varnish. Especially if I’m using it in the middle of a paint job. As a finisher, Satin or Gloss are also options. I do have a bottle of brushable gloss for goopy, slimy monsters, but for the most part I think non-matte makes miniatures look like toy soldiers. Which is not a bad look if that’s what you’re going for!
Brushes
Get some cheap brushes, #2 and smaller, and some dry brushes (I like a #5). I think a lot of folks will say you can do everything with a well-cared for #2, but I love liners and zeroes for detail work. I prefer cheap brushes because I am hard on them. Also, metallics, magic paint and some washes just naturally ruin a brush over time no matter how thoroughly you clean them.
Get some dorky plastic palettes too. I started off with a wet palette because all the videos I watched made it seem like that was a basic requirement, but I prefer to control the dilution of my paint. Wet palettes are no good for magic paint either.
Starting Over
I started over a lot in the beginning. The best way I have found to do so is to submerge the miniature in Simple Green in a glass jar for a few hours. Once it’s soaked, scrub the old paint off with gun cleaning brushes. You might think you’d only want the wire brushes, but the nylon ones come in handy too (they scrub better)!3
What You Don’t Need (Probably)
Magnification! My friends marvel at the fact that my miniatures look so detailed even though I don’t use a magnifying lens or loop. I would argue that they look good specifically because I do not use magnification (though it can be helpful for spotting mold lines). I occasionally use reading glasses for fine detail work because my eyes are old, but even then, I think I wind up spending time correcting things the naked eye is never going to notice. As you will soon learn, miniature painting is mostly illusion and trickery.
Chapter Two: Types of Paint
Acrylic Model Paint
These are your basic, flat colors. Water soluble, quick to dry, predictable in consistency and stable in hue as it dries. I use a mix of Vallejo’s Game Color and Model Color. There is a new formulation of Game Color that is a bit nicer, but I liked the old formulation just fine. Army Painter has a neat triangular color system that intuitively presents you with light, mid and shadow tones when you look at their color charts, which is helpful (Reaper has this too). Mostly just pick the brand whose colors you like best.
Metallics
I have no desire to spend a billion hours using normal acrylic paint to create the illusion of gleaming metal when metallic paint exists. That’s what non-metallic metal, or NMM, techniques achieve through careful, time-consuming blending of regular paints. The oldest school guys used to just leave the metal bits unpainted, which seems bold and unsatisfying at the same time. Metallic paints have little sparkles in them, a bit like car paint, and come in various hues. They’re OK! There are even some new “true” metallic formulations that came out recently that are supposed to be even better. I have recently learned that you can paint the “metal” bits whatever you want and they look fine, too.
Do note that most metallic paint contains particles that really gunk up a brush, like, permanently.
Washes
At their core, washes are diluted acrylic paint. Branded washes are specially formulated to behave in specific, predictable ways but the truth is that any acrylic paint becomes a wash if you add enough water. These are for shadows and effects and some gradients.
Magic Paint
The major brands each have their own lines of this stuff, all of which work similarly. Citadel was the first, with Contrast Paint. Army Painter then did SpeedPaint. More recently, Vallejo released Xpress Color. I never used Citadel because it is too expensive and I don’t like their color range. I did use Speedpaint for a while, but the color range was a bit weird and garish. When Vallejo released Xpress, I was in love. It matches the hues and tones of their Game Color line and is very precise to handle.
But what is it? Well, it’s magic. Applied over light primers, it’s formulated to level in a way that it thins lightly on raised areas and pools darkly in recesses, giving a miniature high, mid and low values in a single coat. It vastly simplifies the basic process, is super forgiving for beginners, teaches a lot about what kind of tones are supposed to go where and is just…fun and surprising every time.
Medium
Medium, is the, uh…juice of the paint? I am pretty sure that’s the scientific term. You can get neutral mediums and add them to paints to expand their capabilities. They’re sort of a more advanced material really, but it is nice to know that magic paint medium thins magic paint, which shifts the value range lighter. You can also get metallic medium to turn any color paint metallic, though I’ve only had middling success with this so far.
Ink
I just started fiddling with inks, but they are great for getting intense color in recessed areas. They flow, unlike the acrylic, which often plops or splatters, so they work great in, say, the engraving on a rune blade, or making corrugated tubing seem semi-translucent. You can also use them as washes, but they don’t work for basic coloring.
Chapter Three: Basic Painting
You can find tutorial videos for just about any painting technique online. Most of the manufacturers have little free handbooks, too, with pictures, which are good reference (better than video in some ways, honestly). If there is something specific you want to try, like rust or other aging, or wood grain, or realistic leather or you name it, there are resources online. What’s below is a broad primer on how I do stuff, which I think will give you a good foundation so you can then start looking for the techniques to build your own style.
Traditional
Step 1: Basecoat. Lay on straight color where you want it, like a 3D coloring book. Don’t worry too much about staying in the lines. Add a tiny bit of water to the pigment to loosen it up. Dilution is the hardest part, getting a feel for how much water is needed, and you only figure it out with practice. Every paint has a slightly different consistency (this boils down to chemistry, as the size of every pigment particle is different, and thus sits uniquely in the emulsion). I find that dipping a dry brush into water then flicking once or twice, then repeating as necessary, is a good starting point, depending on the thickness of the paint. When this step is complete, you’ll have something akin to the paint job you might see on an action figure.
Step 2: Wash. At its core, wash simulates shadow. When I started out, I went top to bottom with black wash and that worked out fine (though, you know, dark). If you do this, you can highlight with the same pure pigments you used for the base coat. Ultimately, I think it is better to be a little surgical; try to paint in wash where shadow would naturally fall, in the folds of clothes, under the brow, under the chin. and to try to experiment with wash colors. Browns are way better on skin tones than black, for instance. Red wash on white is gross. Blue wash on green, or vice versa is nice for fabrics sometimes. Black wash is really good for correcting or minimizing mistakes.
Step 3: Highlight. After the water thing, highlighting is the hardest part of mini painting to get a knack for. I don’t have a ton of good advice, because while I have figured it out to some degree, it’s all like…the feel of the medium or something. I can’t explain it. If you fully wash a mini in black, though, at least for your first few, you can highlight using the original basecoat color and not have to worry about mixing lighter tones or advanced techniques (there are tons of videos on glazing and gradients and pointillism and such that will give you better advice than I can).
I’m not painting showpieces with object source lighting (a technique where you attempt to realistically paint the light and shadow cast by a sculpted light source, like a lantern, or a flaming sword), so my rule of thumb for highlight placement is to imagine the mini being lit from right above. Which, helpfully, your lamp will probably be physically above it, thus showing you the way.
If you want to mix a highlight, a good starting point is 2 or 3 parts color with 1 part white. I tend to water down mixes a lot so they are more transparent. That requires you to go over it more times, but I find that building up the gradient highlight slowly is more forgiving. This can wind up very pastel-like or sometimes dusty-looking, though, which is not to everyone’s taste.
I also like using straight color for highlights if I have a hue in a high enough value that works. Model Color buff is awesome as an all-purpose edge highlight for leathers, it comes across convincingly as rawhide. I find I use pure color a lot for hair strands, flesh of the face and wood grain.
Step X: You can highlight in step 3, and then wash again, which will sort of blend things together. And then you can highlight again. And wash again. Forever, if you like.4
Step 4: Fiddle around. A little dab here, a little there, I’ll always find a couple things to do at the very end to really finish it off. Figure out when to stop, though, overpainting is a real thing.
Slap/Chop

A newer, fast technique. Great for doing a lot of similar models.
Step 1: Prime in black.
Step 2: Drybrush a middle gray all over. The key here is to load up your brush with straight pigment and then unload it on paper or something hard until you barely have any paint left on it. Then lightly flick it over the surface of the miniature so only the raised portions of the miniature take the paint (this is also a good way to highlight stuff with lots of little textures, like fur and chainmail and hair, no matter which method you’re using, though it can wind up looking low contrast and dusty). It might be worth varnishing before drybrushing, because if you’re a brute like me you’ll sometimes chip paint off by drybrushing too hard and hitting the mini with the ferule.
Step 3: Repeat but use white paint, and focus only on spots you want to carry highlights. When you’re done, you should have a black and white miniature that looks as if there is a spotlight shining on it from above.
Step 4: Paint in colors using magic paint.
Step 5: Fiddle around. I think you’ll find that there are more rough bits you’ll want to tidy up with this method, but it is probably the best method in terms of the ratio of quality to time spent.
Magic Painting Method
Step 1: White primer
Step 2: Carefully basecoat with magic paint. That’s it, you’re done.
This one is kind of magical, but also the results are a bit samey and I find it unsatisfying to stop there. They often remind me of those little porcelain animals that come with that one brand of tea bags. Red Rose Tea?
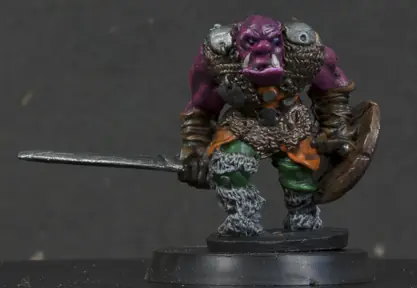
Stu’s Current Method
Step 1. White primer
Step 2. Carefully basecoat with magic paint. Skip any areas you want to be metallic (metallic magic paint is terrible).
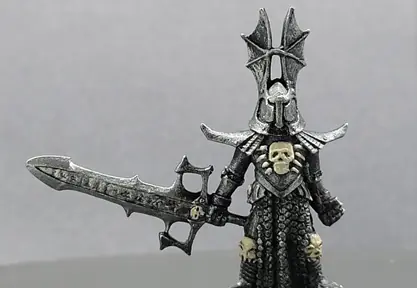
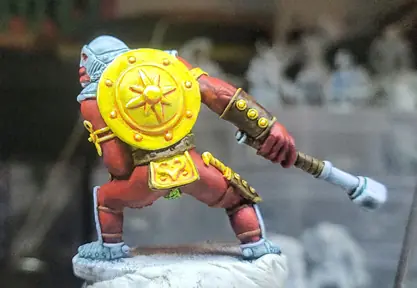
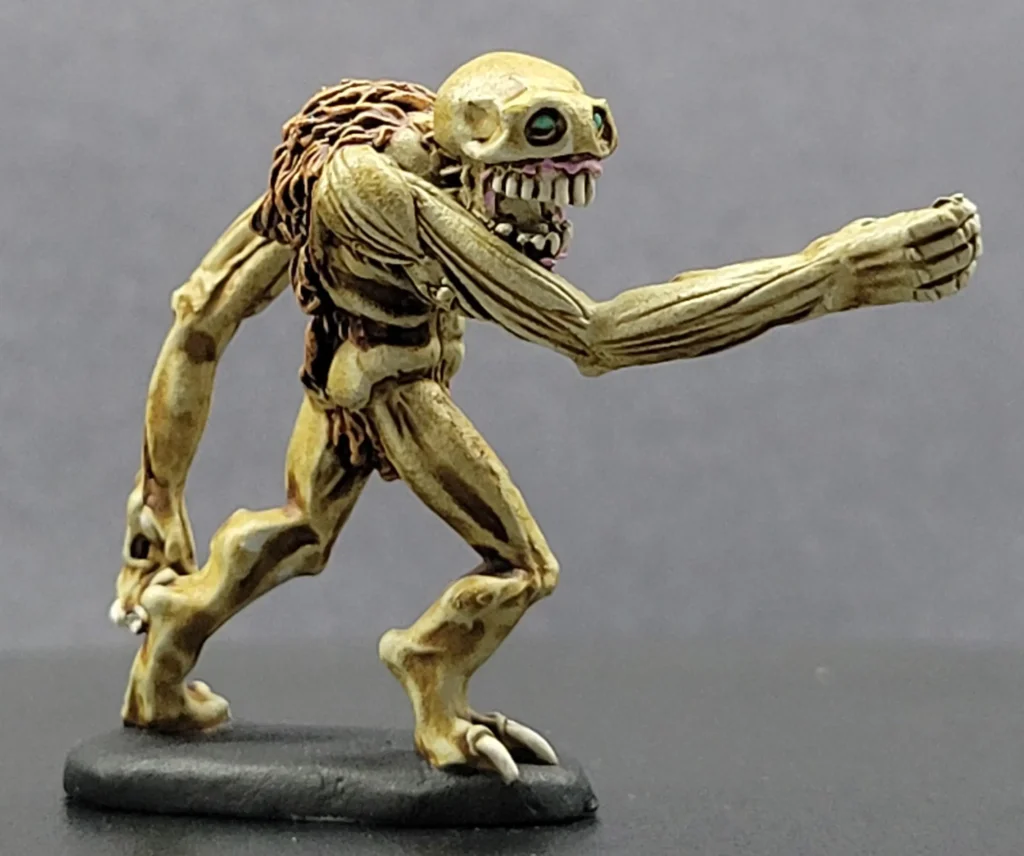
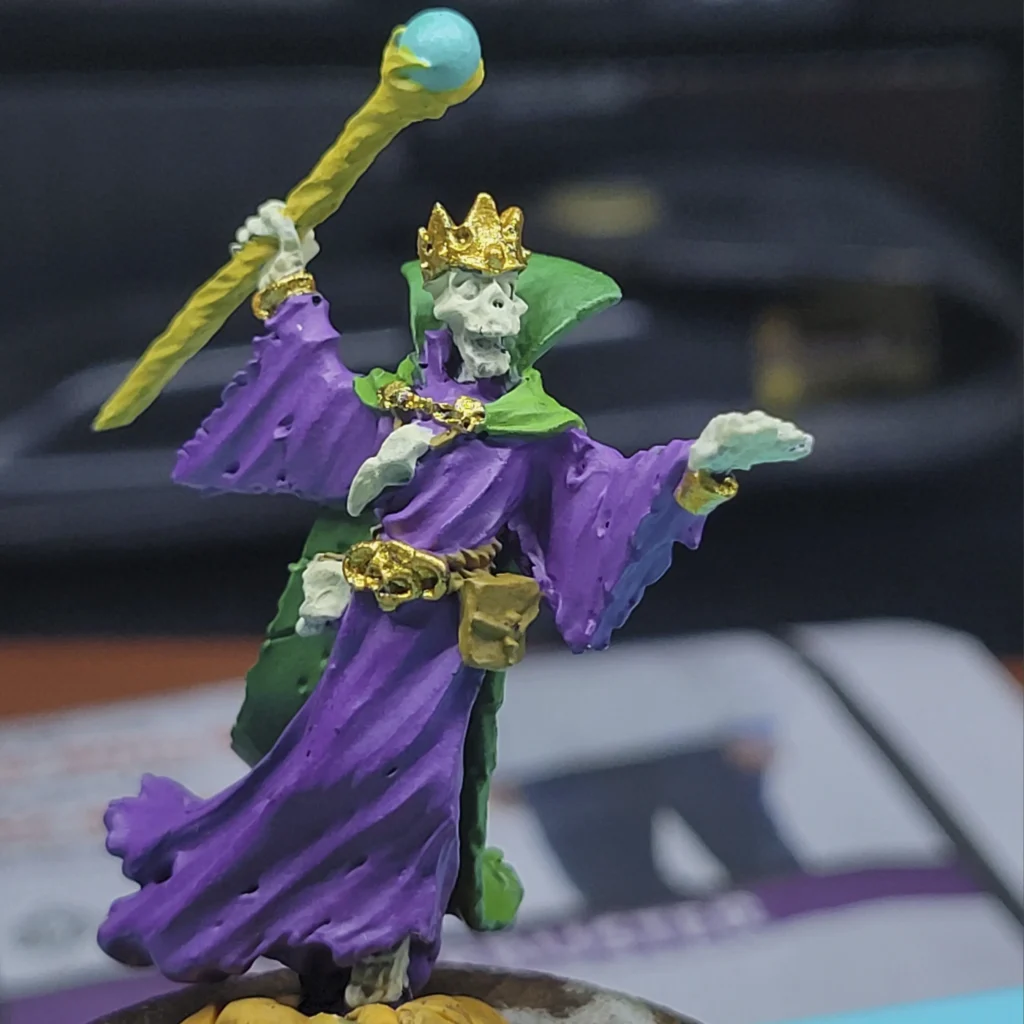
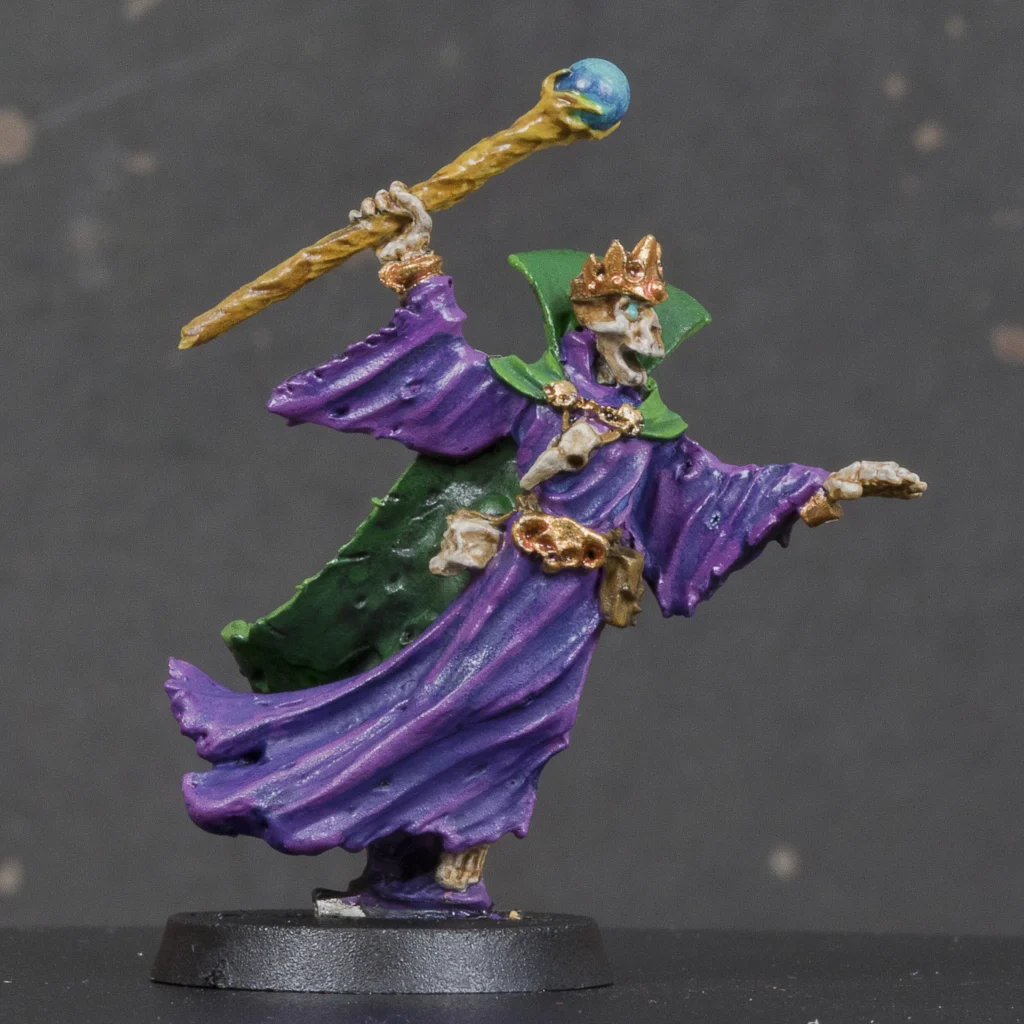
Step 3. Use the traditional method with metallic paints on armor and weapons. Silver metallics look good with brown or black washes. Golds comes alive with red.

Step 4. Judge all the magic paint zones. I think magic paint excels with leathers, some colors of cloths, bone and scaly textures. There is a decent chance that at least some of these are going to look finished right away. I almost always wind up at least reworking the highlights, especially drybrushing fur. About half the time, I’ll glaze over magic paints with diluted regular paint, then re-highlight. Less often, I’ll add dark washes to the shadow zones to make them really dark–the shadows you get from magic paint are never black, but always a dark hue of the base color, which often looks nice for mid-to-light values but a bit crap in the darkest ones. I also find that I use magic paint as a painting guide, letting it reveal where the shadows, mid and high tones should be, and then re-do them. Which sounds like a pain, and it is, but I think it works. At least for me. You’ll probably come up with your own bonehead method over time too.
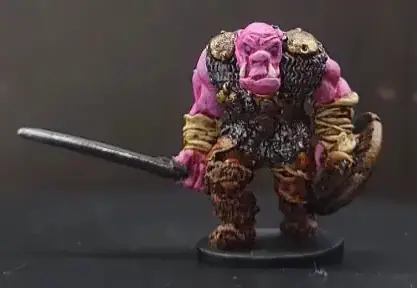
Step 5. Detail work. Way more important than fiddling around in the other methods. Magic paint can easily create a trap where all the colors are the same intensity, so I find that even my best jobs with them wind up being this weird kind of intense-yet-flat look, even after highlighting. My solution is doing details in pure pigment so something pops brighter than the magic paint. So, orc tusks are pure white, edges of leather and stitches in buff, light blue eyeballs. Your choices will be different, but I think you’ll find you have to do something at the end so that it feels finished. I also paint all my bases black, which I think visually grounds them somehow.
Chapter Last: General Advice
Finish the miniature, even if it seems like it is coming out crappy. It probably isn’t and there is usually an inflection point during highlighting when everything clicks and suddenly it looks good. Powering through also forces you to find ways to make corrections, which you can’t learn if you don’t make mistakes in the first place. Also, walk away! Come back tomorrow! You’ll forget what you hated the previous day.
If you hate a certain section, you can always primer over it and try again instead of getting rid of all your work with Simple Green. It took me a long time to realize this! You only get one, maybe two shots at correction before things start getting gummed up, but it’s worth trying. Also, I can’t tell you the number of times I have misread the details of a sculpt and painted it “wrong” only to realize that the paint often tricks the eye. Painted that metal pauldron brown? It reads as leather now! You’ll know the truth, but no one else will.

Even if you think a miniature really sucks when you’re done, keep it at least as long until you finish the next one, so you can see how much better you got. I’ve been doing this for like five years (!) and my most recent miniature is still around 20% better than the previous one. It’s nuts, I don’t think any other hobby offers that kind of return on my effort.
Your minis are gonna look super cool in person but photographing them is going to be…frustrating. There’s a lesson in that about photos and videos of miniatures online and what you have to do to them to make them presentable and how you shouldn’t let that influence how you view your own work.
Finally, remember you aren’t painting a picture from scratch, you’re painting a sculpture that is doing a lot of the work for you already. It’s a collaboration with the sculptor, drawing attention to their cool details, downplaying others, making something unique through your choices. People do sick stuff by being super precise and spending dozens of hours on one miniature, but you don’t feel like that is the only way to make a cool miniature.
- Sometimes, this is a big fucking mess, but other times you can use reactivation to get nice gradient highlights, but that’s a trial-and-error thing you’ll get a sense for over time. ↩︎
- Hilariously, the Monument matte varnish I picked up to knock down accidental glossy finishes reactivates and bleaches magic paint, so I need to spray coat first. Varnish to varnish! ↩︎
- Admittedly, Simple Green does not always work, especially when stripping older miniatures that might have been painted with enamel or other more tenacious paints. Ask around. Metal minis will stand up to just about any chemical you drop them in, but plastic and resin can melt and will do so surprisingly fast. And no matter what you’re using, be careful with the chemicals and be mindful about properly disposing of them. ↩︎
- Eventually you’re going to start to lose sculpted detail, though. ↩︎
